"$uper" frugal living. "$aving" money...one idea at a time.

Tuesday, September 11, 2012

Making Whites Whiter!

I'm here today to talk laundry....AGAIN!  Why?  Because, as a mother of 4 boys, my life revolves around laundry.  My life IS laundry.  Laundry...Period.  :)

As you can see, I've been putting it off for the last few days.  Instead I've been busy painting my living room, cleaning up after painting my living room, teaching aerobics, holding cub scouts, preparing meals, changing diapers.....

Well, when my two oldest came to me complaining for lack of clothing to wear to school I realized the job could be put off no longer.

Here's what I saw after #3 gathered all of the baskets...
And these isn't even all of it.  I already had a load in the washer and the dryer.

GASP!

To make matters worse, I had just emptied my LAST cup of store bought laundry detergent into the washer.  Sigh....

Time to get back to FRUGALNESS!

Luckily I had all the ingredients on hand for my thrifty, nifty Homemade Laundry Detergent.  I tweaked it a bit this time (taking some tips from Why Not Sew).  We'll see if I like it better.

The REAL reason for my post today is because I am trying out a NEW method of making WHITES WHITER!  I found this little ditty on Pinterest (my new best friend) and am totally going to try it out.

In this house, NOTHING stays white for long.  Why should it when it can be stained with grass, dirt, and general muck, right?

Here is the "recipe":

HOT water
1 cup of laundry detergent (I'm using my homemade soap)

1 cup powdered dish washer detergent 

1 cup bleach (or color safe bleach if any color present)

1/2 cup borax

 Fill the washing machine with HOT WATER (you can even BOIL a gallon or so of water on the stove to add to the washer to make it that much hotter). Then add the "ingredients".  Agitate the machine for a few minutes (BEFORE ADDING CLOTHES) to allow dishwasher detergent to dissolve.  THEN add clothes.  Allow clothes to soak for as long as you can (overnight if possible).  Finish cycle.

Because I have some time restraints (aka a million loads to get through today) and didn't have time to allow the load to soak in the washer, I turned to the bathtub.  Yep...I said the bathtub (or a plastic tote would do).

I filled it with hot HOT water (yeah, we keep our water heater up pretty high), then added the laundry soap and bleach.

Next I filled a large pan with a gallon of water, set it on the stove to heat, and then added both the dishwasher detergent and the borax.  By the time the water reached a boil, the detergent/borax had dissolved.

I added the water/detergent/borax to the bathtub and stirred.  Now for the clothes.

(I would have taken a picture of this but I'd rather not post a pic of my unmentionables on the internet, thank you very much.) 

I let the load soak in the tub for several hours (5-6) and then transferred them, in a basket, to the washing machine. 

I ran them through a regular HOT cycle, with an extra rinse for good measure.

The end result was spectacular.

 It truly did make my "whites" whiter.

I think I will make a regular habit of this.  It's very nice to see things "glow" again.  :)

Tuesday, May 1, 2012

DIY Dry Erase Wall Calendar

I know, shocker...I am finally posting on this blog.  Gasp!

Remember when I said I was going to take a month break?  Yeah, well when that was over we found out we were moving....then we prepared for the move...then we moved...all the while, while I was NOT blogging I was, instead, obsessing over Pinterest.  Which is why we are here today.

I've started decorating my house.  $uper Frugal (Pinterest inspired) Style.

You see...while the house we bought may be new to us, it is definitely not new.  It was built in the late 70's.  I really don't mind that, except that in the foreseeable future it will need a few repairs.  (Starting with ripping out the nasty animal/urine stained carpet that was SUPPOSED to have been cleaned professionally.  Never happened.).  So...I need to be $aving money anywhere I can on more "frivolous" things. 

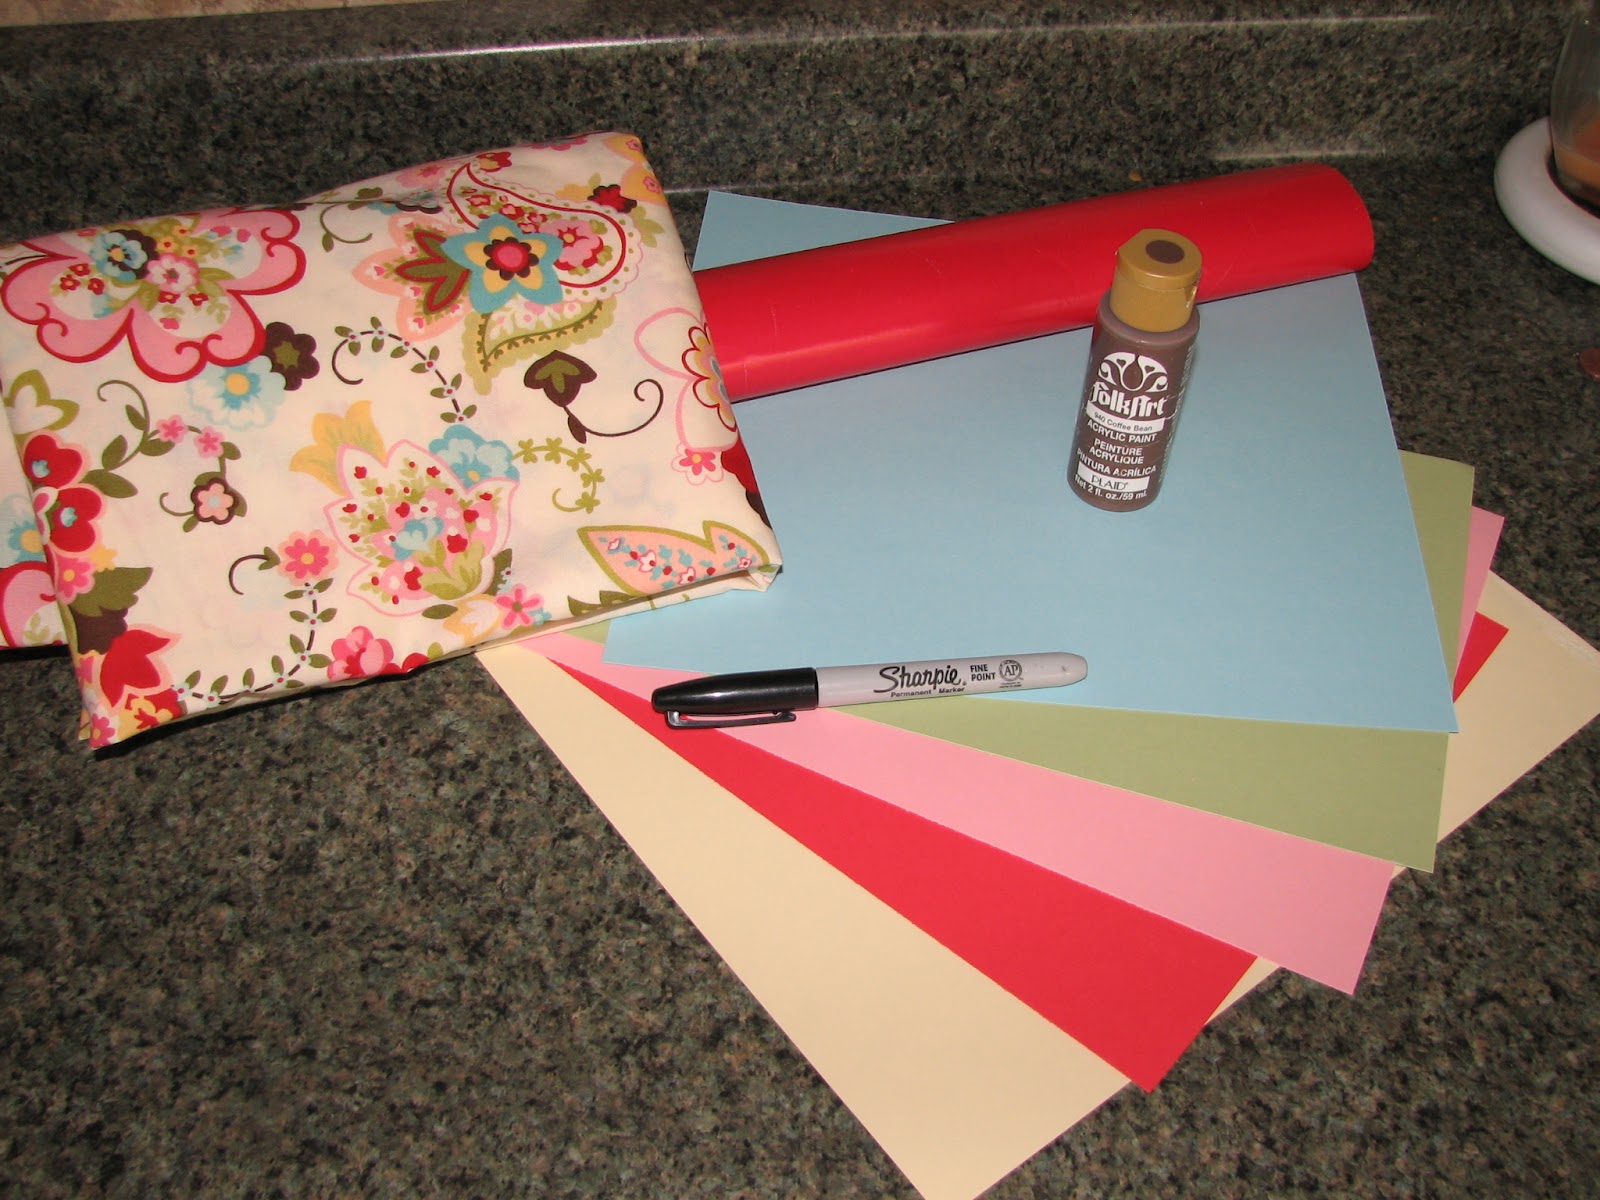
That's why I am ecstatic about today's project.  It didn't cost me a thing.  I had all the supplies already (that NEVER happens).

I have been scoping out Dry Erase Wall Calendars on Pinterest and found a few that I liked but didn't LOVE.  So...I used those ideas as a "guideline" and made up my own.  Now...before you all go thinking I am a creative genius, you are wrong.  This took me HOURS upon HOURS to think up...and it really only evolved as I got going.  I'm really surprised it turned out so cute...to tell you the truth.

Supplies used:
*Picture frame (I used an old one my mother-in-law gave me years ago...Walmart has them for cheap)
*Paint for frame (if you want to change the color)
*Polyurethane to seal paint (which I haven't actually put on yet because SOMEONE threw it away during the move....Roberto!)
*Strip of my new favorite fabric (Paisley Floral Cream -by Sophia, purchase at Jellys Roll 2 Go)
*Coordinating Scrapbook Paper
*Permanent Marker
*Wrapping paper (with grids on the back)

Honestly, the HARDEST part was trying to measure and evenly space the boxes.  I may, or may not, have sworn in my head (or even out loud) a few (many) times.  Seriously!  I ended up using wrapping paper that I (surprisingly) had.  I used the grids to help measure the two inch length (my boxes are 2.75 inches by 2 in) so at least a few of my lines would be strait.  :)

FYI...the days of the week ("Sunday, Monday, etc") and "notes" were written directly on the scrapbook paper, the boxes are drawn on the INSIDE of the glass (so the lines stay month after month), and the month ("May") and days of the month ("1, 2, 3, etc") are written on the OUTSIDE of the glass (so you can erase and change them every month).

I'm really REALLY happy with the finished product.  

It's to be the main focal point on the empty kitchen.  I was sure to incorporate all of the colors I want to use in the entire room to draw them all together. 
More $uper Frugal (Pinterest inspired) projects to come, I am sure.

Signing out,
Melanie

Tuesday, February 21, 2012

How To: Clean and Deodorize Your Dishwasher

Does your dishwasher look like this?
(or some other nasty variation of it?)
Do you find little food particles stuck to your "clean" dishes?
Do your dishes smell "fishy", even after they have been washed?

Mine did.  And it was grossing me out.  Big time.   

So I did a little research (here and here) and set about fixing the problem. 

All it takes is a little vinegar.  Really!   

$uper easy....$uper cheap! (Commercial products can be expensive...and are not necessary.)

HOW TO:  CLEAN/DEODORIZE YOUR DISHWASHER
Step 1  Fill a cup or bowl with 1 cup vinegar (distilled white is best).  
Step 2  Place cup/bowl on top rack of EMPTY dishwasher.
Step 3  Run dishwasher through a REGULAR wash cycle, hot of water as possible (heat dry not necessary)

VIOLA!
Not brand new...but a VAST improvement.
I even stuck my head in there and "took a big whiff".
Ahhh....fresh.  No more "fishy" smell.

For more extensive cleaning/deodorizing try these tips:
1.  Remove utensil holder and lower rack
2.  Use an old toothbrush or dish scrubber to clean around inside of dishwasher door (paying close attention to crevices and rubber seal) with HOT soapy water.
3.  Use a sponge or clean cloth to wipe down the entire interior of the dishwasher, including the bottom (pay close attention to the drain where food particles collect).
4.  Replace utensil holder and lower rack. 
5.  Repeat steps 1,2 and 3 from above, only pour an additional cup of vinegar over the bottom of the dishwasher as well.

Tuesday, February 14, 2012

Homemade Valentines Card

Okay, so I know I'm supposed to be taking a break for a while. But...I couldn't help but post something about this cute homemade Valentines card I made for my better half.

I don't know about you, but I cant STAND paying more than a dollar for a card. In fact, more often than not I gift without cards...because I can't fathom forking more than that...no matter how cute they are.  Call me cheap, if you will.  I prefer the term "practically frugal".

This year I decided to use my My Memories Scrapbooking Software to whip up something simple (and FREE).  Here's what I came up with.
embellishments- MMS software, paper-north pole express pack,

paper-North Pole Express Pack
I printed the first page out on velum and the second on heavy white card stock and then fastened them to another piece of folded card stock.  Simple....cute....and $UPER FRUGAL.

I LOVE FRUGAL!  Don't you?

Melanie

P.S.  If you'd like to order My Memories Suite Scrapbooking Software for yourself, or someone you LOVE,  use promo code STMMMS10850 at checkout and save $10!  (making it only $29.97 plus you'll have $10 to use at the MMS online scrap store). 

Saturday, February 11, 2012

My Kryptonite


This $uperwoman has found her Kryptonite.

Okay...so I've found a few things contributing to my ultimate demise.

Winter/overcast skies being at the top of the list.

Overdoing, under-planning, loss of priorities, Pinterest (he he), lack of sleep, etc.......

Life has begun burying me in it's rubble and I'm loosing the strength to fight back.  I must take action now.  

Okay....a bit melodramatic, I know.  

The truth of the matter is this...I've taken on too much and lack the energy to do it all. 

Keeping up with three blogs, 4 boys, laundry, cooking, cleaning, frugal living (let's face it...it takes time), volunteer work, exercise, couponing etc, etc, etc....is just too much for me right now.


I really need a nap.....a long one.

So....I'm taking a break.  Just a little one.

I need time to access life and get my priorities back in order.

In the meantime I'll be storing up and implementing all sorts of $uper frugal ideas to share with y'all.

Don't miss me too much.  :)

I'll be back before you know it.

Melanie

Monday, February 6, 2012

AND THE WINNER IS......

Bethany Wolf
CONGRATULATIONS BETHANY!
And thank you everyone else for your participation in the PAPARAZZI ACCESSORIES GIVEAWAY!


If you didn't win but are still interested in purchasing some of this $UPER cute product, or if you would like more info on becoming a consultant yourself,
contact Lacy @ paparazzipayson @ gmail . com


Saturday, January 28, 2012

Crayon. Dryer. AGAIN! Are you KIDDING me?!?

After the last incident, where a crayon found it's way into our dryer, I have been ever vigilant about checking pockets.  Although it was great fun to spend hours scrubbing waxy stains out of clothing at the expense of my poor skin-less knuckles, I never wanted to have to do it again.

And then....TODAY!  I get home from a nice relaxing run to find THIS:

WHAT THE?!?
WHO WHAT?!?

Him....it was him.

His defense..."It must have been in that ONE pocket I didn't check."

Apparently!

Now...this girl is trying desperately not to complain.  I mean..I realize I am a very lucky girl.  I'm married to $uper Man.  He's very helpful and very involved.  He washed, folded and put away 4 loads of laundry today.  See what I mean...he really is $uper.  

When he asked "Okay...so what do I need to do to get it out.?"  

I sighed, "Not today....it can wait."

Monday he will officially become a student of my class,  How To:  Get Melted Crayon out of Clothes 101.

Melanie

(P.S. Roberto said I should give him more credit than I posted here.  He really did think he had checked every pocket.  Then I had to explain to him that sometimes humor is lost with too many words.  Poor guy.  He really is awesome...did I tell you that already?)

Thursday, January 26, 2012

"Angry Birds" Cake

 
Yeah...we're pretty big "Angry Birds" fans around here. The "fever" became even hotter when we got the kids Angry Birds: Knock On Wood Game and Angry Birds plushes for Christmas.  Now we can't seem to get enough of them.
(I've become quite the master builder and they the master "knock-er-down-ers)

So it didn't surprise me too much when Little Red picked an "Angry Birds" cake for his birthday a few days ago.  

We googled and pinterested (Yep.  I make up my own words) and didn't come up with anything this cake decorating rookie thought she could manage.  Everything was made with fondant (including the characters), which I DO NOT do (I can barely handle store bought tub frosting), so I had to come  up with something else.  I packed all 4 of my XY's into the car and headed to Winco with this particular card (which Little Red picked out from the game) as inspiration.
Shopping for ingredients becomes a difficult task when you have a child with nut allergies (birthday boy) so we had to get creative.  The original plan was to use Little Debbie Nutty Bars (which I would still recommend using if you can) but turns out they are manufactured in a plant with tree nuts (he's deathly allergic to cashews) so we had to strike that plan and find another solution. We settled for these instead:
Now...for the birds/pigs.....  
We scoured the bulk section and decided on these:
It took a bit of time, manipulation, and a tooth pick, but I was really satisfied with the results.
The pigs
black and red bird

yellow birds

pigs:  green Tootsie pop, Tootsie rolls
black/red birds:  Tootsie pops, Tootsie rolls, sprinkles (for eyes)
yellow birds: dots in center (to form Tootsie roll around), Tootsie rolls and sprinkles (for eyes)

Now for the cake:
I used a regular 9 x 13 sized cake (you could definitely go bigger) and frosted and textured it, with the back of a frosting knife.  You could also try coloring coconut and sprinkling it on top (I didn't because my kids don't like it). 

Add some regular ol' kabob skewers to stabilize the structure (if using Nutty Bars you may not need these...just a bit of frosting to hold it together)...
 even from the back
and WALLAH!

  ANGRY BIRD CAKE!

Now....I have to say that I would STILL recommend using the Nutty Bars if you can.
Cream filled cake pieces were just not as stable (even with the skewers) as I would have liked them to be.
After falling over three times, from the sheer weight of the structure, 
we decided to let it rest.
 The kids thought that was pretty cool too.
("Just like in the game")
Whew...thank goodness.

The best part about it...
the entire thing was edible (unlike nasty fondant).
The birds/pigs were the kids favorite part.

and when they're happy....I'm happy.

It was a really fun project/cake.  I wouldn't hesitate doing it again.

So what do you think?  Any ideas on what I could have done to make it more stable?  I'd love some feedback!

Monday, January 23, 2012

"No...cuz you're not very stylish"

One of the BEST things about hosting a GIVEAWAY is getting a chance to test out the product.
Aren't these CUTE!?!
It's not very often I get the privilege of enjoying pretty things.

I put one of these fancies on tonight (the one with the gray ribbon) and my oldest, 8 year old G-McBabe, kept looking at me...baffled.

"What?  Don't you like it?"  I said.

Still staring...."uhhhh...," he stammers.

"Not me?" I ask.

He hesitates, "No...(and then...) cuz you're not very stylish." 

I feigned offense....and then laughed.

He's got a point.

I did try the necklace on with my gray Gonzaga hoodie.  Yeah...I'm cool like that.


What I took from the situation was, A. Even my 8 year old thinks these Paparazzi pretties are "stylish"
and B.  I need to wear them more often and change his opinion of ME!

What do you think?

Melanie

If you want to be "stylish" too, be sure and enter the Paparazzi Accessories GIVEAWAY and have a chance to win one of these beauties for yourself.  You have until February 6 so hurry up already.

STOP---SCRATCH THAT--REVERSE!

Shame on me for not doing my homework first.  Bad Melanie....Bad.

Anyone remember the little Food Storage Project I've posted about...and been working on.....anyone?  You know...the One Year Food Storage for $5 (ish) Dollars a Week?....yeah?  That one? 

Remember me telling you that we had to give a bit of breathing room for skyrocketing food prices (because I wasn't exactly sure how long ago the program had been written), hence the "$5(ish) dollar a week" thing, instead of just plain ol' "$5 dollars a week"?  Yeah...well.... the "ish" seems to be quite a stretch of the imagination.

As I've been out....researching this little project....I have come to a conclusion.  This little "program" is a lot older than I thought.  $5 a week...even $5 (ish) dollars a week just isn't going to cut it.  Not even close.  $10 dollars a week....maybe.  Maybe!

So.....STOP---SCRATCH THIS IDEA---REVERSE!  


Time for a new "food storage" plan.  I can see it is going to take a little more work on my part.  I'll let you know what I come up with....as soon as I come up with it. 

Sorry for misleading you...it was not my intention.

Melanie

Saturday, January 21, 2012

"GFC" technical difficulties

So...here's the deal....I'm experiencing some technical difficulties with Google Friend Connect because of the transfer from T.O. to Adventures in Frugalness.

If you started following me through "GFC" at Testosterone Overload, could you do me a favor?  Sign into the new GFC button on this sight.  You may see double posts in your reader for a bit...while I work out the kink but it should be "all good" in the end.?

And...if you are new here...just go ahead and "join" us as usual.  Thanks.

Thursday, January 19, 2012

GIVEAWAY! PAPARAZZI ACCESSORIES

 YEAY!  IT'S GIVEAWAY TIME AGAIN (I have been itching to get another one going!).


Oh...and this is a good one...you do NOT want to miss out on it.


Paparazzi Accessories independent consultants offer adorable, stylish jewelry and accessories at a fraction of the price of your typical retail store. Everything is just $5!  (YEAH....you heard me right!)

What do you get for $5?

$uper cute necklace/earring sets, rings, bows, headbands, bracelets, and more! They also offer children’s earrings and rings for just $1 (gasp).

Here are some of their products.  Aren't the beautiful?


(See more at www.facebook.com/paparazzijewelry5bylacy)

Well...my friend Lacy just happens to be a consultant for Paparazzi Accessories and has kindly offered to host a GIVEAWAY for you, my readers here at Adventures in Frugalness!

Lacy will be rewarding 1 lucky winner with a 4 piece jewelry set!  The set will include a necklace, earrings, bracelet, and ring....all handpicked by the fantastic Lacy, herself.

Isn't that AWESOME?!?

To enter, follow the directions on the Rafflecopter widget.


IMPORTANT....IN ORDER FOR YOUR ENTRIES TO BE VALID, YOU MUST FOLLOW THROUGH WITH THE "ACTION" DESCRIBED FIRST (ex. click "join this sight" on GFC, click the "like" button on Facebook, etc) BEFORE YOU CLICK THE GREEN "+1 DO IT!" BUTTON ONE THE WIDGET!!!!!  CLICKING THE GREEN BUTTON ALONE WILL NOT AUTOMATICALLY FULFILL THE REQUIREMENT FOR YOU.  ALL ENTRIES WILL BE VERIFIED.

Plus...see below on how you can become a consultant yourself.

a Rafflecopter giveaway


 Are you interested in becoming a consultant yourself?  If so, here's a little not from Lacy.

If you are looking for a fun and rewarding business opportunity Paparazzi Accessories is for you. As a consultant you are free to choose your own schedule. Work as much or as little as you would like. The harder you work the more rewarding it can be. Now is your chance to jump in and join this amazing company! With a 45% retail commission and 5-10% in your down line, Paparazzi has some of the highest percentages in the business. If you have never heard of Paparazzi, that is a good thing! That means you could be the first in your area and have people working under you in no time. I joined Paparazzi Accessories in May 2011 and there were just 200 consultants, now there are over 2,000. http://www.paparazziaccessories.com/compPlan.aspx

You can become a consultant for as little as $40 by paying the enrollment fee. That gives you access to purchase and sell product. Additionally you will be eligible to enroll new consultants. I highly recommend the purchase of a starter kit. The $300 kit is a great way to go. It contains 100 of the most popular pieces. Below is a link to show you the different kits available. http://www.paparazziaccessories.com/starterKit.aspx

If you like what you see, you can enroll online. It only takes a few minutes to complete. My consultant # is 1215. https://extranet.securefreedom.com/paparazzi/Signup/EnrollNew_Ask.asp?ReturnURL&Products

If you have any additional questions, please email Lacy at paparazzipayson@gmail.com I would love to answer any questions for you.

Linking up to:


Best hide-n-seeker EVER!--Adventures in T.O.

Best hide-n-seeker EVER!  Yeah...that would be me!
"Is that a skirt you are wearing?," you ask.
"Yes...yes it is."
"Did you climb up there all on your own?"
"Yes. I. did."
  BO-YEAH! 
(although my husband insisted on being chivalrous and helped me down)


And...I have to add...that they NEVER would have found me.....if the 21 month old hadn't ratted me out.

Monday, January 16, 2012

Laundry Updates PLUS How To: Deodorize your washing machine

It's been two months since I first started seeking out tips to $ave money in the laundry room.  I thought it time I report back.

First, the Homemade Laundry Soap is working out fabulously.  Now, although I have never been a Tide snob, I do have certain expectations for the cleanliness of my laundry and this soap passes the test.  Which is fantastic...because it's $uper cheap and easy to make.  In fact, I'm making my second batch today.

Then, I discovered a way to get rid of static in the dryer by using a tightly wadded ball of aluminum foil.  We tried it for a while (and it worked great at first) but have since abandoned this idea.  As winter set in, and there were no signs of precipitation, things got really dry around here...and our clothes got extremely static-y.  The aluminum balls just weren't cutting it.  Plus, we started noticing some black/grey streaking on the inside of the dryer.  I don't think they were denting in....just leaving marks...and so we said "bye, bye aluminum balls" for now.  Shucks....I hate it when frugal ideas don't pan out. (if you tried this out....leave a comment and tell me how it went for you.)

One last thing to update on.

We've been using vinegar as a natural deodorizer/fabric softener, as a supplement to the Homemade Laundry Soap , for "soiled" loads of laundry (thanks for the tip livingrichwithcoupons).  It totally works.  I highly recommend it.  (Fresh smelling underwears and sheets makes for one happy mama).

Speaking of vinegar and laundry (I swear, do I ever have a chance to think about anything else?), today I wanted to share something new with you.

How To:  Deodorize Your Washing Machine

Have you ever opened up the lid to your washer and almost passed out from the stench.  I used to...all of the time.  Then, one day, I couldn't take it anymore and went about looking for a way to remedy this problem, without spending a lot of $$ on those brand name (expensive) washing machine cleaners you can find at the store.

That's when I came upon some pretty interesting information (at ehow.com).
In 1999, Dr. Charles Gerba, a University of Arizona professor, conducted a study on the cleanliness of Americans' washing machines. After washing a sterile washcloth in 60 homes, he found evidence of fecal matter and E.coli in approximately 25 percent of the machines. Dr. Gerba theorizes that laundry has become less clean due to fewer Americans using bleach and hot water in addition to shorter washing and drying cycles. Deodorizing your washing machine should be a frequent task not only to eliminate odors, but to kill the bacteria and germs left behind when you finish a load of laundry.
Nasty, yes?  Luckily, following were some tips on how to clean out said odors/bacteria....which I got to, right away.

First step: Pick your cleaning agent.....distilled white vinegar or bleach.

To clean interior (rim, lid and dispensers) and exterior of your washing machine:  Soak a cloth in equal parts distilled white vinegar (or bleach) and hot water.  Wipe all surfaces thoroughly. **Don't forget the rubber seal (especially on a front loader)**.  Allow surfaces to dry and resume normal use.

To clean the tub:  Start a normal wash cycle and allow the tub to fill with HOT water.  Once full, add one GALLON of distilled white vinegar (or 2 CUPS bleach) and allow machine to completely run through the cycle (washing, spinning, rinsing, draining).

WALLAH!  Stench free and sparkling!  For under $2.

Other tips/ideas:
*Leave the lid of your washer open in between loads to allow for drying/airing out.
* If you frequently wash in cold or warm water, consider adding at least one HOT water load to your weekly routine to prevent mold and mildew from forming.
*According to ConsumerReports.org, four common culprits cause odors most frequently in washing machines: using too much detergent, using fabric softener, washing clothes in cold water, and infrequent use. Modifying these habits may decrease the need to deodorize your machine as often.


Have a happy, stink free day, y'all!  :)

Sunday, January 15, 2012

Custom Coat Hanger---Yes! It's finally up!

If you'll remember, several weeks back, I set out to find a solution for this problem:
I think you will agree that this coat rack is far to small for our families "needs".

I was inspired by Katie from Project: Possible and her post project: from empty wall to mud room to create something workable for my family/home.

I headed off to Home Depot and picked up an piece of scrap wood for $.87 and a round stick to cut dowels out of.  Then I sat on it and sat on it.

I sat on it because I realized that, while I loved her idea (and was SO in need of it's inspiration), it was not exactly what I wanted.  What I wanted was something a little fancier (because it would be a major decorative piece in my scantly decorated home), something that would last for a lifetime, and something that would easily accommodate our growing family (nope, not an announcement).

But...what I wanted was definitely going to cost me more than the $1.80 I had already forked out.  I so wanted this project to be $uper cheap.  Bummer.  What was a girl to do?

In the end, I turned from what was most frugal and, instead, went for what I really wanted, despite the cost difference.  (My mama always said, "Buy the best you can afford.")

At least I still used the $.87 piece of scrap wood. 

I sanded, painted, distressed, polyurethane-ed, measured, drilled and added hooks (just under $4 each)....and this is what I ended up with.
 I LOVE IT!
Yeah...it cost me more than I originally intended but....the results are priceless.

Where else are you going to find a custom made coat hanger with seven (yes, 7!) double vertical hooks, spaced 3.5 inches apart, in the precise color you want....for under $35 dollars?
Nowhere!  
Believe me...I looked.

And....despite our sincerely lacking carpentry skills, my husband and I FINALLY got it hung on the wall.
(See how nice and organized everything is?)
Now...I'm not going to lie...it may or may not stay up for long.

But, hey....at least it will look good while it lasts.

There's always plan B.
(What's a few more holes in the wall, anyway?)

Tuesday, January 10, 2012

$5(ish)/week Food Storage Round-up--Week 1 and 2

Like I told you to begin with, I will be reporting my own $5(ish) dollars/week Food Storage finds to give all y'all a better idea of what we are up against, with food prices on the rise. 

I went out shopping today for both week 1 and week 2.  Here's what I picked up (keep in mind that I have a family of 6 so I multiplied my weekly budget and items x 3):

Week 1
15 cans of Cream of Chicken Soup @$ .97each = $14.55
- $1.50 in coupons
Total =  $13.05 or $4.35 per 5
($1.95 under my families budget for week 1 or $.65 under per 5)

Week 2
24 cans Chicken Noodle Soup (substituted for Tomato) @ $.79 each =  $18.96
- $3.60 in coupons
=  $15.36 or $5.12 for 8
($.36 over my families budget for week 2 or $.12 over for 8)

The plan is to take the leftover money (for me it's $1.59 or $.53 per 2) and put it in an envelope or jar to Save for future food storage purchases. 

WEEK THREE is 6 LBS salt and $5 in small bills ($1's) so as the grocery circulars come out tomorrow, keep your eye out for any sales on salt.  You can also try your local bulk foods store (Costco, Cash and Carry, etc) and see what they have.


Have you been out yet?  What did you find?  Care to share?

Extra savings on this weeks food storage items

If you haven't yet picked up this weeks food storage items, don't forget to pair them up with these coupons for extra Savings.

$1/5 Campbell's Condensed Soups, excluding Great for Cooking Soups 01/05/2012 Campbell's Kitchen (exp 02/10/2012)
$0.40/4 Campbell's Chicken Noodle or Tomato Soup 12/04/2011 SS Insert (exp 02/01/2012)
$040/4 Campbell's Condensed Chicken Noodle & Tomato Soup 01/08/2012 SS Insert (exp 03/15/2012)

and if you still need to pick up last weeks items, try these coupons too

$0.50/4 Campbell's Condensed Great for Cooking Soups 01/05/2012 Campbell's Kitchen (exp 02/10/2012)
$0.25/4 Campbell's Condensed Great for Cooking Soups 11/06/2011 SS Insert (exp 01/15/2012)

also, you may have already been on coupons.com this month and printed out similar coupons.  I just printed mine last night but they are no longer available.  BUMMER! 

Happy Saving!

Monday, January 9, 2012

Amish Friendship Bread

If you will remember, this is what I gave out for frugal neighbor gifts this year and, I must say that we, ourselves, have been enjoying it (every 10 days...he he he) ever since.

It's the gift/recipe that just keeps on giving and giving and....you get the idea.

What I like most about it is that it's cheap, it's flexible and it always turns out SUPER tasty. 

AMISH FRIENDSHIP BREAD

IMPORTANT NOTES:  Do NOT use ANY type of metal spoon, bowl, whisk, or beaters...
(see note* below).
DO NOT refrigerate
Batter will rise, bubble and ferment...
if using a plastic bag, let air out as needed.

STARTER:
1 pkg active dry yeast
1/4 cup warm water (110 degrees)
1 cup sifted flour
1 cup white sugar
1 cup warm milk (110 degrees)
In a small bowl, dissolve yeast in warm water for about 10 minutes.  Stir well.  In a 2-quart glass, plastic or ceramic container, combine flour and sugar.  Mix thoroughly (or flour will get lumpy when milk is added).  Slowly stir in warm milk and dissolved yeast mixture.  Loosely cover the mixture with lid or plastic wrap...or place in a plastic zip bag.  The mixture will get bubbly, let air out as needed.  Consider this Day 1 of the 10 day cycle, or the day you received the starter.  For the next 10 days handle the starter as follows:

Day 1- make or receive the starter, do nothing
Day 2- Stir starter in bowl, or if starter is in a plastic bag, mush the bag
Day 3- Stir or mush bag
Day 4- Stir or mush bag
Day 5- Stir or mush bag
Day 6- Add 1 cup each flour, sugar and milk.  Stir to mix or mush the bag.
Day 7- Stir or mush bag
Day 8- Stir or mush bag
Day 9- Stir or mush bag
Day 10- Follow these instructions

If in a bag, pour the contents of the bag into a non-metal bowl.  Add 1 to 1 1/2 cups sugar, 1 1/2 cup flour and 1 1/2 cups milk.  Stir (with a non-metal spoon or whisk).  Measure one cup batter into four 1-gallon zip bags and give away, along with a copy of the recipe.  Preheat oven to 325 degrees.  Add the following to the remaining 1 cup batter:
3 eggs
1 cup oil (or 1/2 cup oil and 1/2 cup applesauce)
1-2 tsp cinnamon
1 1/2 tsp baking powder
1/2 tsp baking soda
1 large or 2 small boxes instant pudding**
1/2 cup milk
1 cup sugar (some recipes don't call for this)
1/2 tsp vanilla
1/2 tsp salt
2 cups flour
Grease two large loaf pans.  In a small bowl, mix together, an additional, 1/2 cup sugar and 1 1/2 tsp cinnamon.  Dust the greased pans with 1/2 of this mixture.  Pour batter evenly into the two pans and sprinkle the remaining sugar mixture over the top.  Bake 50-60 minutes.  Cool bread until it loosens evenly from the pan (about 10 minutes).  Serve warm or cold.  

*NOTE:  Because of the starters extremely acidic properties, the use of metals can cause a chemical reaction that messes with the fermentation process and basically kills the yeast (not to mention contaminating the starter).  There are some arguments as to whether clean, stainless steel can be used for the starters.  I don't use it.  I do, however, use my stainless steel beaters after the starters have all been divided up and placed in bags and I am prepping the rest of the ingredients for baking. 

**You can use any flavor pudding you want.  Try using one small vanilla and one small banana cream.  Try one large chocolate pudding plus add 2 TBSP cocoa powder for SUPER yummy chocolate bread.  The possibilities are endless.  You can find lots of varieties (like lemon poppyseed, banana or apple) on allrecipes.com .  

Today I tried 1 small box butterscotch and 3 boxes chocolate pudding...then added chocolate chips (pictured above).  SO YUMMY!

Helpful Hint (I got this idea from my mom):  When giving away to others, it's always nice to include the date of your starter (day 1), the date they will need to add ingredients (day 6), and they date they will bake (day 10).  like so:


Remember that if you keep a starter for yourself, you will be baking it every 10 days.  If you get tired of the cycle....give all the starters away and make some for yourself again when you are well rested and ready to go again.  :)

Happy Baking and Making Friendships!

Thursday, January 5, 2012

One Year Basic Food Storage for $5 (ish) Dollars A Week--January

If you missed reading One Year Basic Food Storage for $5 (ish) dollars a week--Overview, head on over and take a look.  Otherwise, none of this will make sense.  :)

So...here are January's weekly lists.

Keep in mind that this list is for every 2 people in your family.  Adjust the food and $$ amounts according to your needs.  Also...remember that some weeks you may have extra....save that change in an envelope or jar for the weeks that you will go over, because it will happen, but it all evens out in the end.

Okay...and one more thing.  We do have to cater to inflation.  This "go around" is sort of experimental.  I'm going to try $6 a week for every 2 people ($18 for my family) and see how that works out.  I really have no idea.

Okay....I think that's all the prefaces....

January
WEEK ONE:  5 cans Cream of Chicken Soup
WEEK TWO:  8 cans Tomato Soup (our family is substituting Chicken Noodle)
WEEK THREE:  6 LBS salt
WEEK FOUR:  20 LBS sugar
WEEK FIVE:  50 LBS wheat


So...happy Food Storage-ing this month.

Don't hesitate to report back with your questions or finds.

One Year Basic Food Storage for $5 (ish) Dollars A Week--Overview

I grew up in a home where food storage was taken very seriously.  My mother has ALWAYS been good at hording food and it saved our families bellies over and over.  When my husband and I had just had our first child, I became a SAHM and he made $7.75 a hour.  We relied pretty heavily on the food storage my mother had been building up for us (Christmas presents...he he).  Some weeks, I only had $12 or so dollars for fresh groceries.  True story!  Our food storage definitely saved us too.  

One of my "New Years Resolutions", this year, is to get a better hold on my year food storage.  It's looking pretty sad right now.  Something about dragging 4 kids to the store and pushing around a full cart while trying to wrangle them just doesn't appeal to me....so I have been avoiding it at all costs.  And it shows.  Like I said...our storage shelves are looking pretty empty and the task of filling them once again seems daunting, to say the least.

Then I remembered I had picked up this "Food Storage for $5 dollars a week" program at a church activity not too long ago.  Ta Da!  Perfect.  I can do that.  (I only wish I knew who came up with it so I could give them the credit...but I don't.  So...if it was you....thank you.)

The basic idea is that, for every two people in your family, you can build up a basic years food storage on just $5 (ish) dollars a week (because there are 6 of us, that's $15 a week, $60 a month).

The reason I say $5 (ish) dollars is that, as you know, food prices are rising.  This program is a few years old, at least, so we'll have to account for inflation.  My plan is to keep track of my purchases and report the present day cost to give all y'all a better idea.

By following this plan you should end up with:
500 lbs wheat
180 lbs sugar
12 lbs salt
6 lbs yeast
10 lbs honey
6 lbs shortening
40 lbs powdered milk
5 lbs peanut butter
45 cans tomato soup (we dont eat this so we will be substituting for chicken noodle)
15 can cream of mushroom soup
15 cans cream of chicken soup
21 boxes mac and cheese
12 lbs macaroni
24 cans tuna fish
500 pain reliever pills
1000 multi-vitamins
                ---for every two people.

Now...if you don't have the room to store this much food (we are going to have to get creative ourselves) you can adjust the amounts as you see fit.  The idea is to prepare yourself for whatever may come (unemployment, sudden financial hardship, etc) and to do it little by little so that it doesn't stress you out or strain your food budget.  The way I see it...something is better than nothing. 

Basic Instructions:
Each week you will take your $5 (for every two people) and purchase the items on the list.  Some weeks you will not spend the whole amountSave the left over in a jar to be used for the weeks you may exceed the $5 (like when purchasing wheat and pwd milk).

These basic staple items should be enough to sustain 2 people for one year.

Remember to add an extra $5 dollars a week and double or triple (or quadruple...or  he he) the amount of items being purchased for every two people in your family.

How does that sound?


Happy Hoarding!

One Year Basic Food Storage for $5 (ish) Dollars a Week--JANUARY
Related Posts Plugin for WordPress, Blogger...